What is SmartQ? #
SmartQ is a tool that helps you automate the creation and sharing of products, collages, and Videos on social media networks.
Benefits of SmartQ
- Saves time, since creation and posting happens automatically
- Posts are randomised and diverse, which ensure higher engagement and less monotony.
- Posts are not repeated – unless specified. This creates a more interesting social media experience for your audience.
When you signup, Outfy creates a default SmartQ for you. It is there to familiarise you with SmartQ. It runs daily so that you get acquainted with it’s smartness and intelligence of auto creation & posting. You may turn it off anytime you wish to.
Find SmartQs
When you log in, you will find SmartQ to your left. The screencap shows you exactly where.

SmartQs List #
The SmartQ list shows you your existing SmartQ tasks. The SmartQs you add or remove are reflected in this list. You can edit or delete your SmartQs on this list.
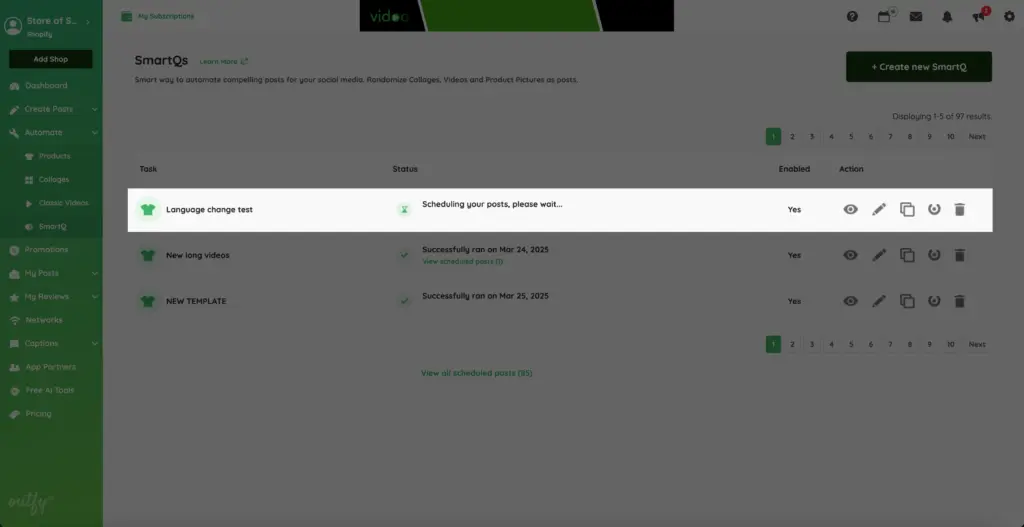
SmartQ status
The SmartQ status shows you if your SmartQ is ON or OFF. Press the button to do or undo the needful.

Create SmartQ
The button to the right of your screen is to get you started on creating your own SmartQ.
Post Details #
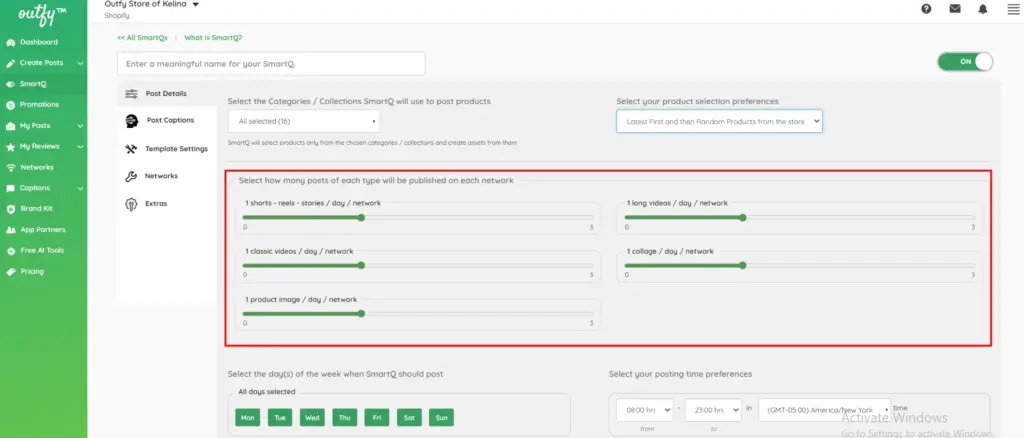
Name Your SmartQ
This is where you name your SmartQ. A meaningful name helps you easily identify your task later.
Example: Morning Collage
Note: Please do not use special characters in the name such as apostrophes, exclamation marks, commas, full stops, etc.
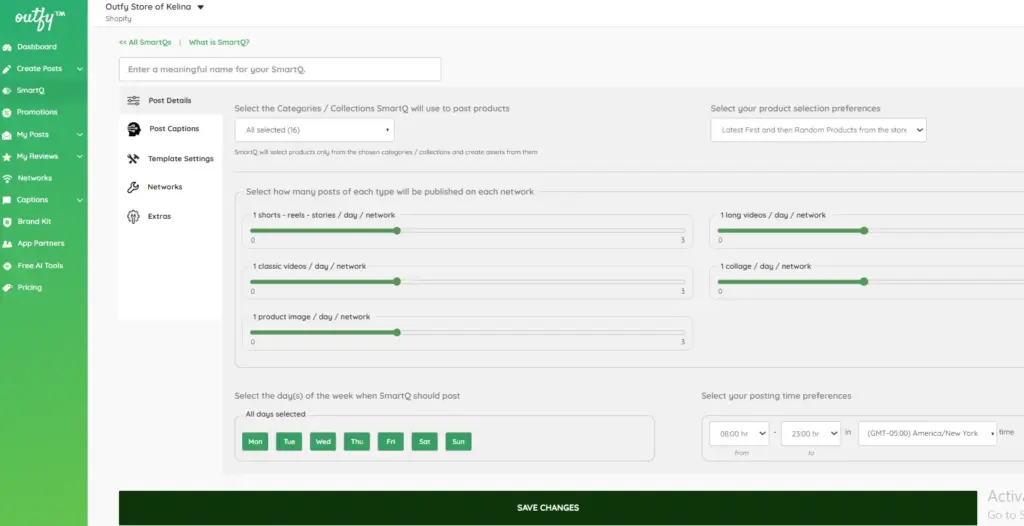
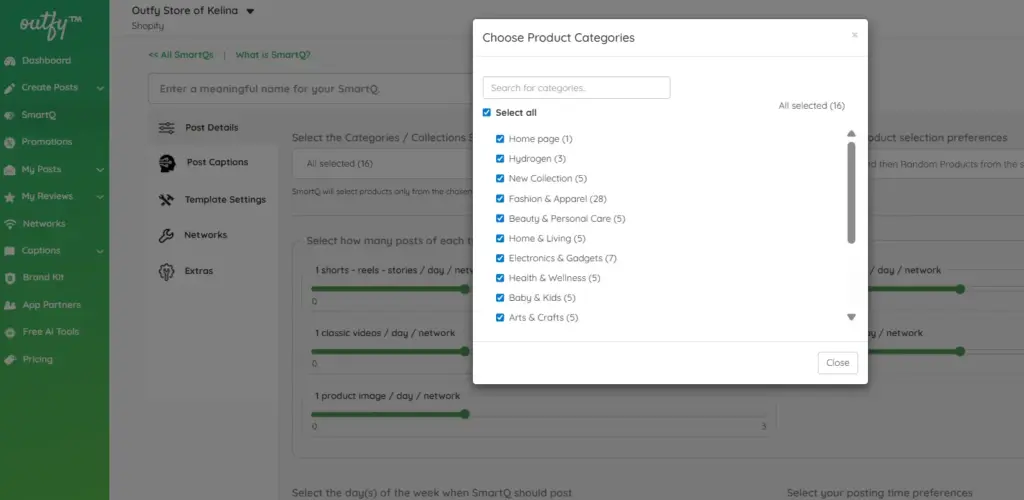
Select Categories / Collections
Here you choose the Categories or Collections SmartQ will use to select products for posting.
SmartQ will only pick products from the selected Categories/Collections and create content using them.
Product Selection Preferences
Choose how SmartQ should select products for your posts:
- Latest / Newly added products to the store
SmartQ will always pick your newest products first. Best if you want to promote fresh arrivals quickly. - Latest first and then random products from the store
SmartQ will prioritize your latest products and, once they are used, will rotate through other products randomly. This keeps your content fresh while still promoting new items. - Random products from the store
SmartQ will randomly select products from your entire store. Ideal for balanced promotion of all products without prioritizing new ones.
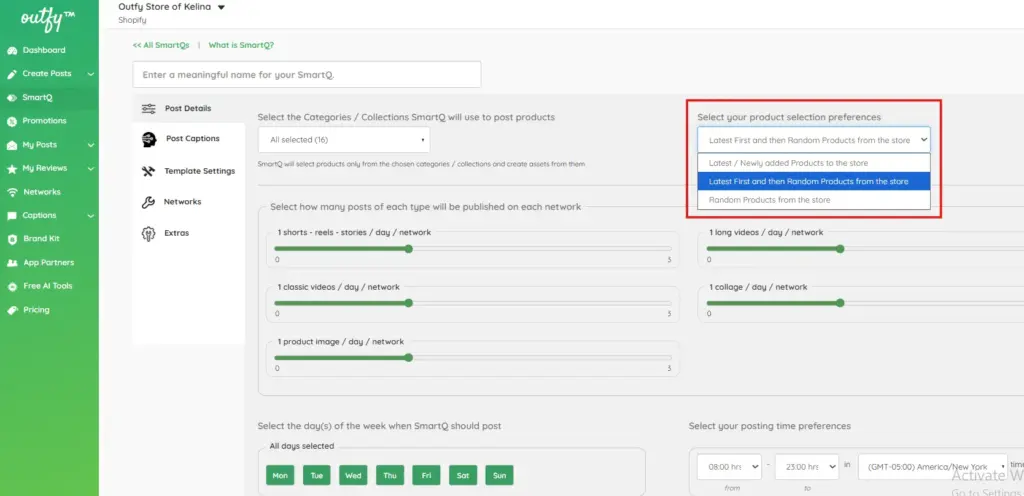
This setting helps you control whether new products get priority or if your posts rotate evenly across your store.
Set Post Counts
Here is where you set your post counts. You can post up to three of each kind of content per day. For example, one Collage, one Long video, one Classic Video, one Product.
Note: Your plan may limit certain post types. If your plan does not support a type, you will see an upgrade option.
Posting Schedule Settings
Here you control when SmartQ should publish your posts.
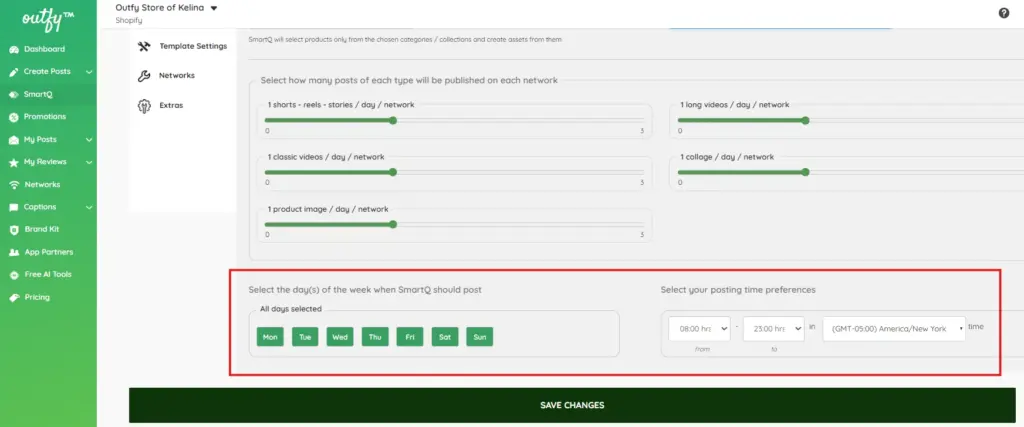
Select Posting Days
Choose the days of the week when SmartQ should post.
By default, all days are selected: Mon, Tue, Wed, Thu, Fri, Sat, Sun
You can turn off any day if you do not want posting on that day.
Select Posting Time Preferences
Set the time range during which your posts will be published.
For example: if you can instruct SmartQ to post only between 9am to 9pm (which is 21:00 hours in 24 hours format), SmartQ will schedule your postings only between 9am to 9pm only.
Time Zone Settings
Outfy automatically shows your default time zone based on your profile. You can change it if needed.
Example: If your profile time zone is EST (New York) but you want your posts to be scheduled according to PST (Los Angeles) time, simply select the PST time zone. SmartQ will then publish all posts based on that selected time zone.
These settings together ensure your posts go out on the right days, at the right time, and in the correct time zone.
Note: Between Time works on 24 hours time format. 1pm equals 13:00 hrs and 12am is 24:00 hrs.
Post Captions #
Use AI-generated captions
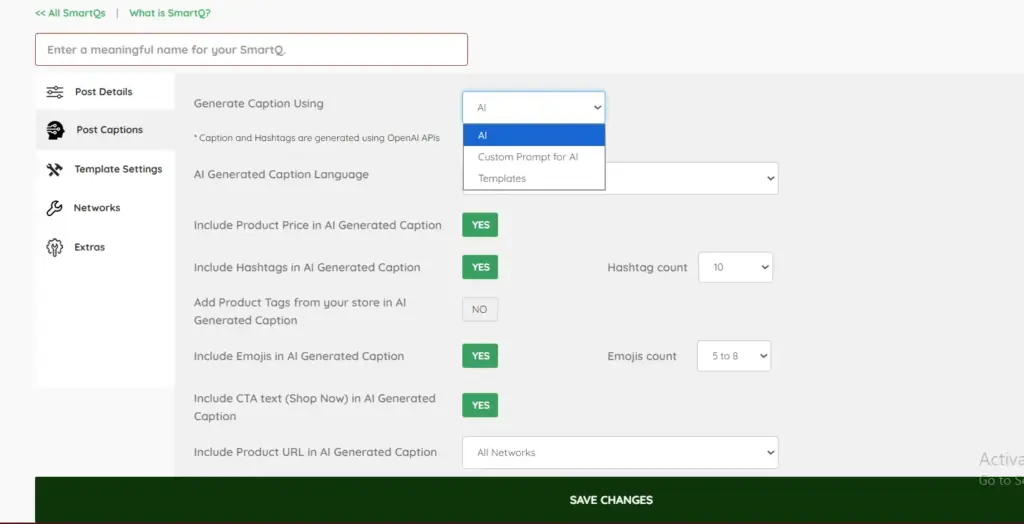
Use Outfy’s most powerful feature – AI generated captions and hashtags for your posts. These captions are generated using OpenAI’s services – the industry leader in artificial intelligence.
Customize how your captions are created by setting the following options:
Language Selection:
Select the language for caption generation based on your target audience.
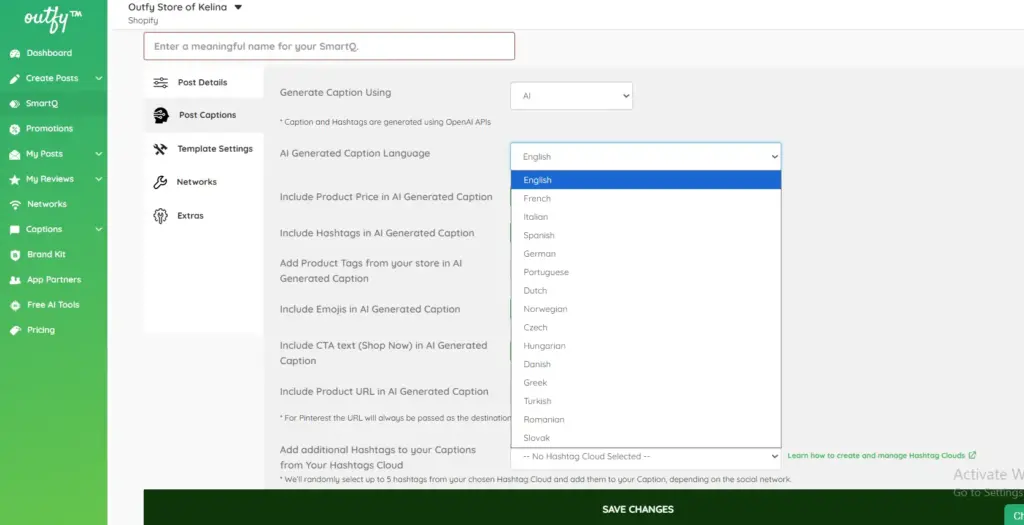
Supported languages include:
English, French, Italian, Spanish, German, Portuguese, Dutch, Norwegian, Czech, Hungarian, Danish, Greek, Turkish, Romanian, Slovak
For example, if you want to post in French to target users in France, just select “French” as your AI caption language.
Include Product Price:
Enable this option if you want to automatically include product prices in your captions.
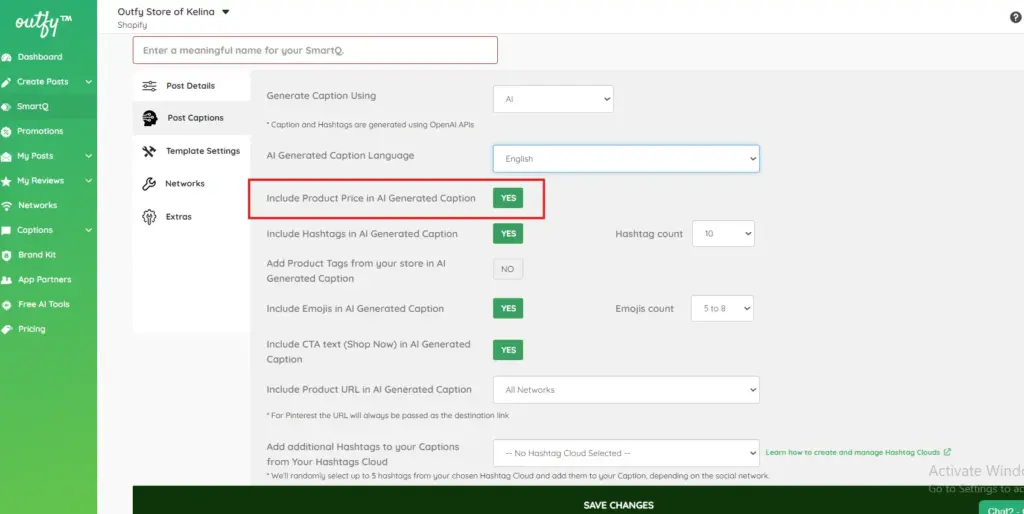
Benefits:
- Makes pricing transparent for customers
- Boosts click-throughs by showing affordability or discounts upfront
Example: “Grab this cozy sweater today for just $29.99 – perfect for the chilly season!”
Hashtag Settings:
Automatically add relevant hashtags. You can choose between 1 to 10 hashtags from the dropdown menu.
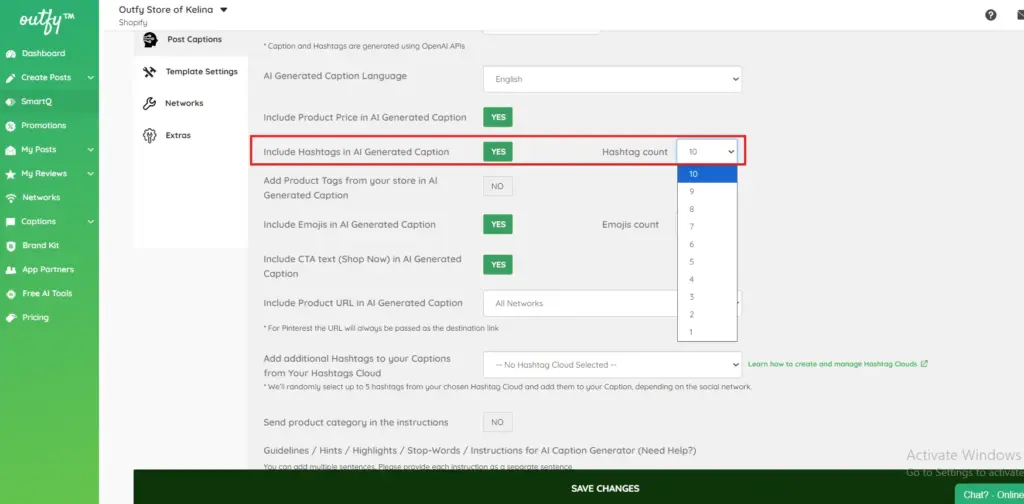
Benefits:
- Increases your reach and discoverability
- Helps your content appear in trending or niche categories
Example: “Stay stylish with our eco-friendly tote bag #SustainableStyle #EcoFashion”
Allow this setting to boost your visibility with AI-generated hashtags.
Include Emojis:
Make captions more expressive. Select an emoji range like 2–4 or 5–8 based on your tone preference.
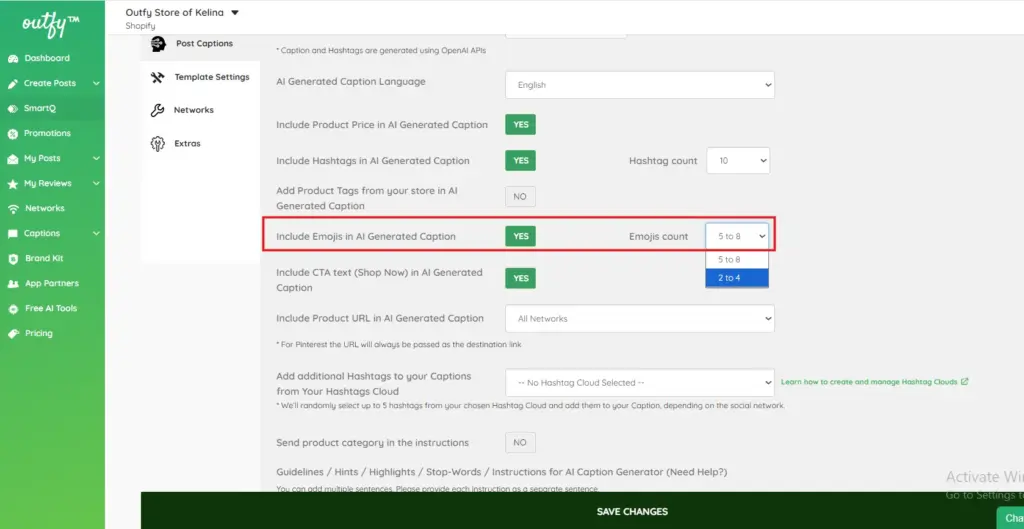
Benefits:
Captures attention
Makes posts more relatable and expressive
Enhances visual appeal
Example: “Unwind after a long day with our lavender soy candles
Enable this setting if you want emojis to be automatically added in your captions.
Call to Action:
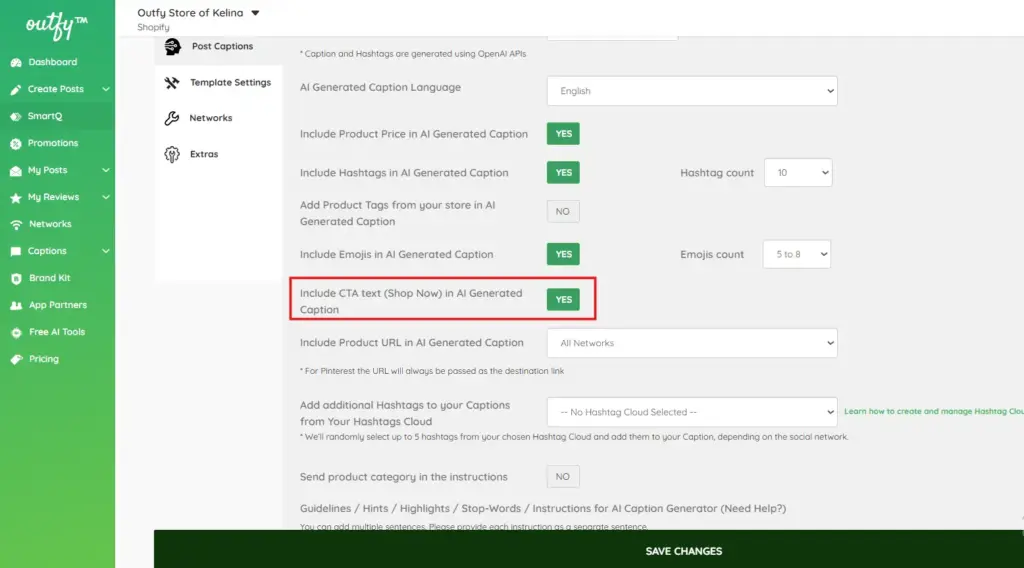
Add a CTA (Call to Action) like “Shop Now” to encourage clicks.
Product URL Placement:
Decide where product URLs should appear using the dropdown options:
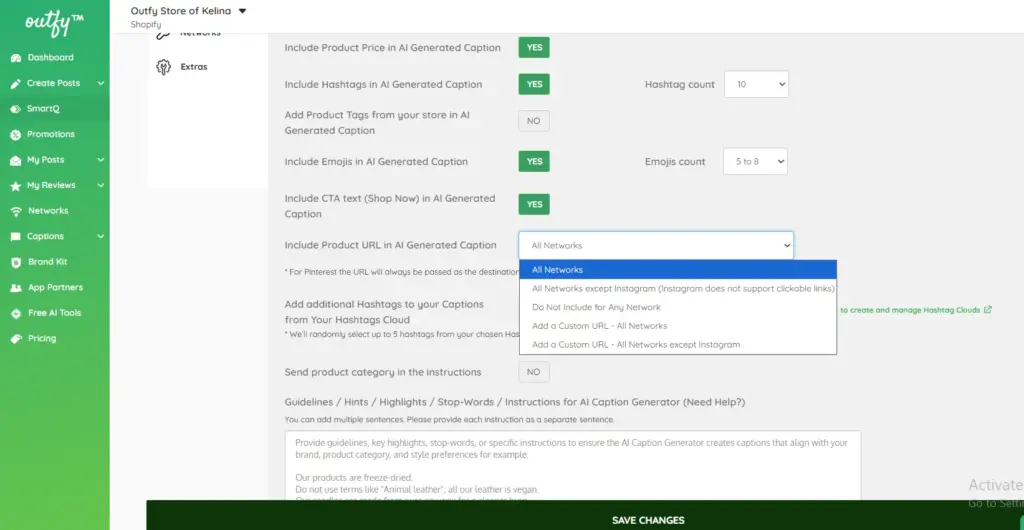
- All Networks
- All Networks except Instagram (since Instagram doesn’t support clickable links)
- Do Not Include
- Add a Custom URL (for all or selected networks)
Benefits:
- Directs users straight to your product page
- Increases click-throughs from posts
Note: Instagram doesn’t support clickable links in captions, so it’s best to exclude URLs for Instagram.
Hashtag Clouds:
Create custom Hashtag Clouds tailored to your brand.
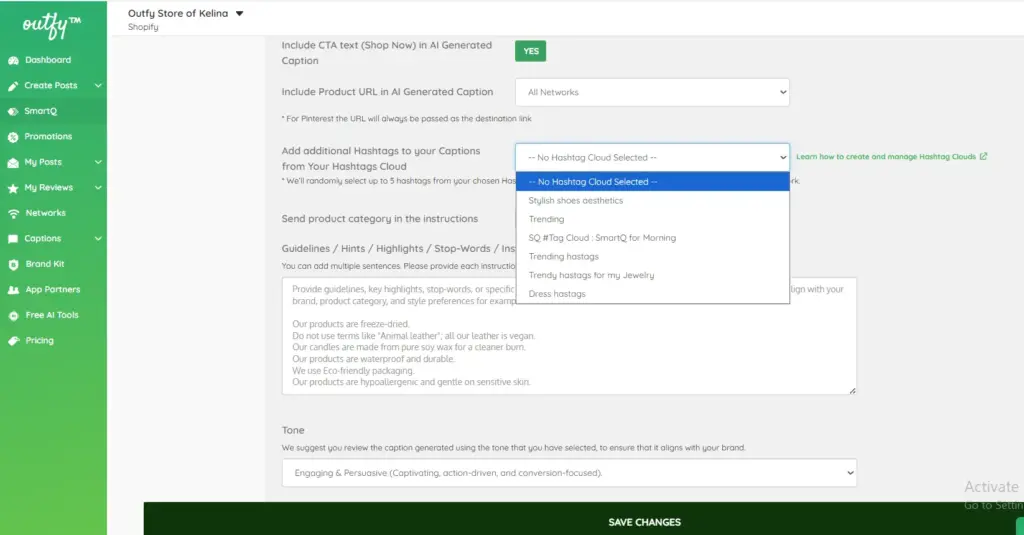
When selected, Outfy will automatically and randomly add up to 5 hashtags from the chosen cloud, based on the social network.
Custom Hints:
Custom hints help the AI generate more relevant captions.
You can also enable the Product Category hint to better align captions with your product and brand.
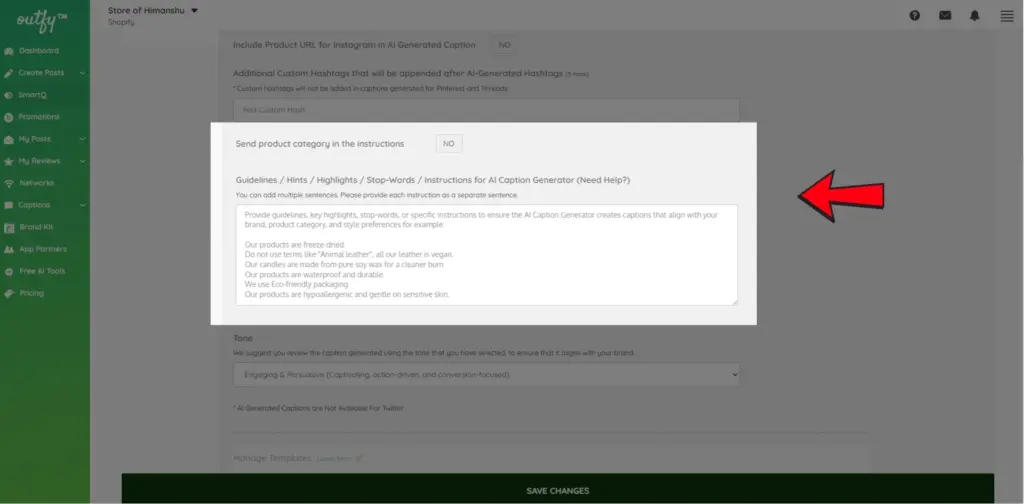
ou can include:
- Highlights
- Guidelines
- Prohibited terms
- Tone instructions
- Special product features
Examples:
- “Our products are freeze-dried.”
- “Do not use terms like ‘Animal leather’; all our leather is vegan.”
- “Our candles are made from pure soy wax for a cleaner burn.”
- “We use eco-friendly packaging only.”
- “Avoid words like cheap or lowest.”
- “Use a professional and minimalist tone.”
If you’d like the AI to follow such rules, enable this option and write your instructions in the box provided.
Otherwise, you can leave it disabled.
Tone Selection:
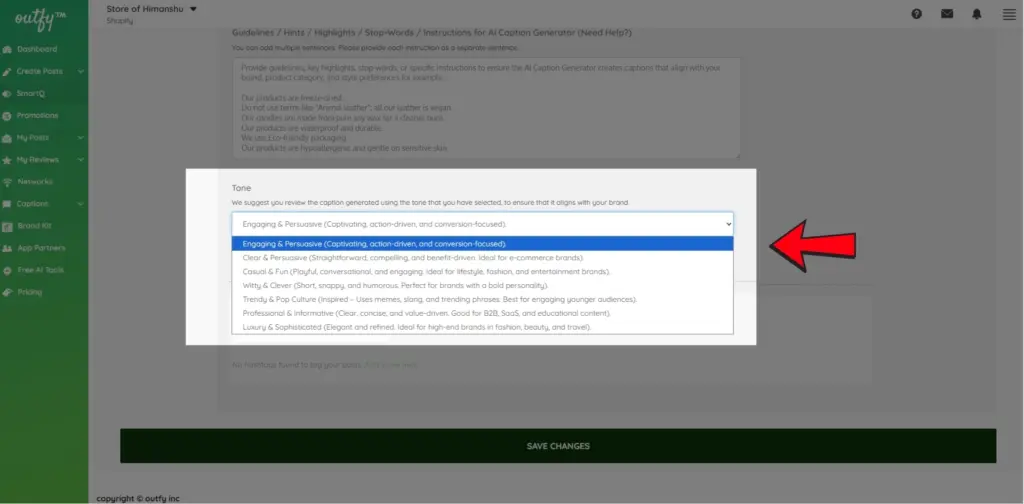
Choose a tone to guide how your AI-generated captions sound — such as friendly, professional, persuasive, casual, or funny. This helps match your brand voice across all posts.
Note: Make sure to review the final caption to ensure the tone fits your style.
Custom Prompt For AI
Use Outfy’s Custom Prompts AI to create captions your way. Enter your own custom prompt and have full control over the style and content of your captions
How to Use Custom Prompts for AI in SmartQ:
Select Custom Prompt for AI
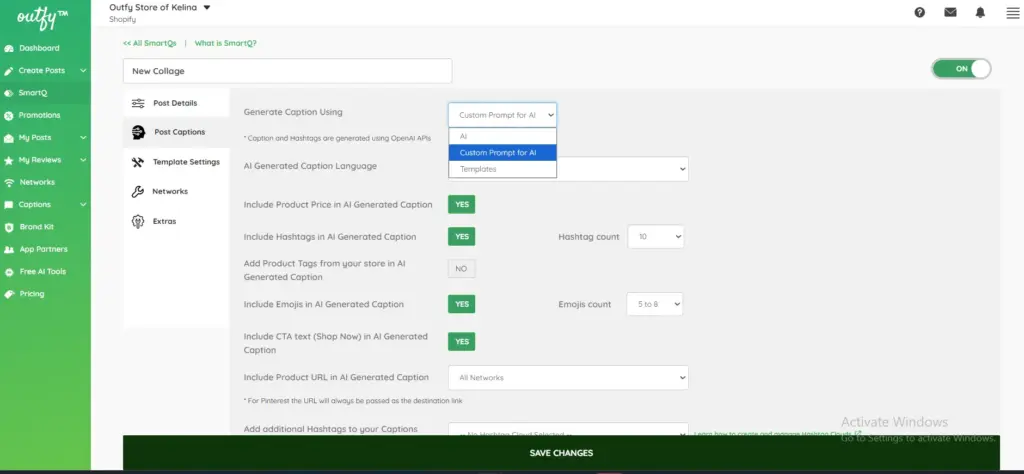
- In the Generate Caption Using dropdown, select “Custom Prompt for AI.
Turn Off All AI Caption Options
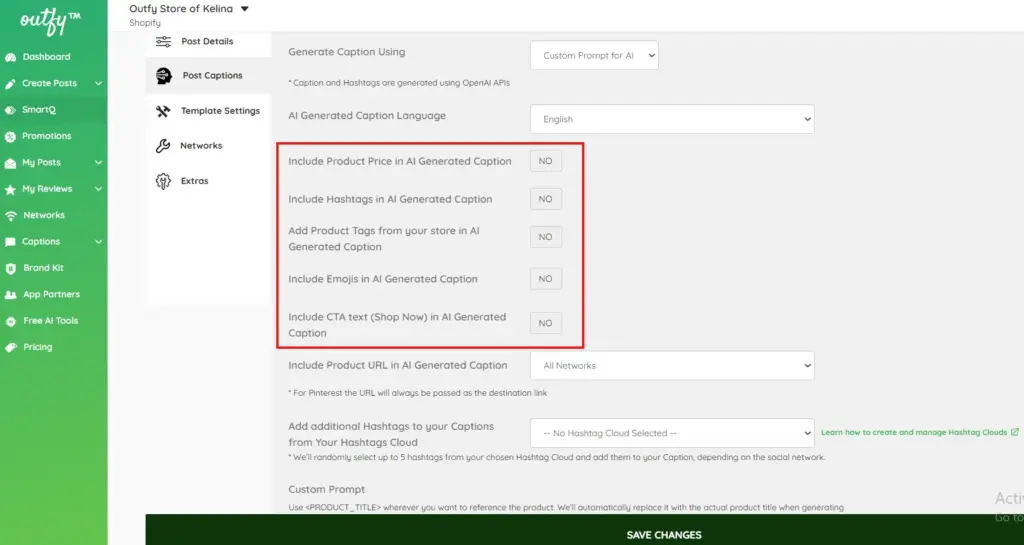
To ensure only your custom prompt is used, turn OFF the following options:
- Include Product Price
- Include Hashtags
- Add Product Tags
- Include Emojis
- Include CTA text (Shop Now)
Enter Your Custom Prompt
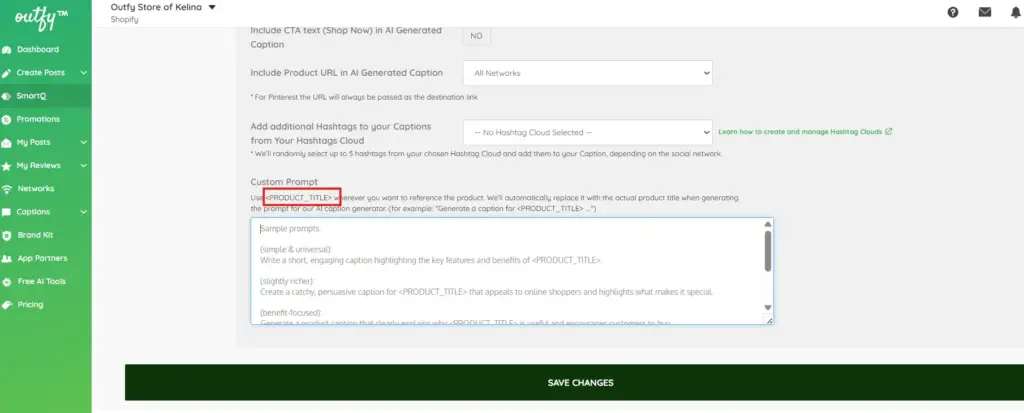
- Scroll down to the Custom Prompt section and type your preferred prompt.
- Wherever you want the product name to appear, use
<PRODUCT_TITLE>. The system will automatically replace it with the actual product title when generating captions.
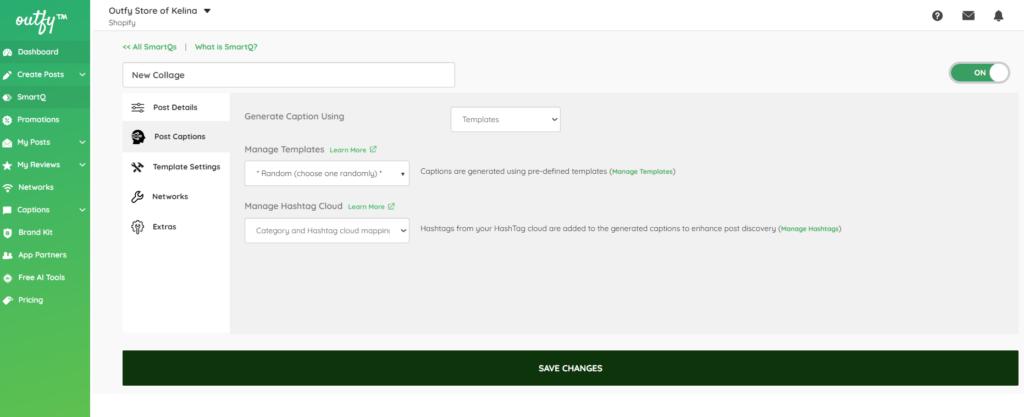
Use Post Templates
If you are not using AI powered captions, you can use the regular templates for generating captions.
Templates
We have a separate Templates Guide to help you understand Templates fully.
For Templates, you can define which caption template you want to use. You can either select a template OR ask SmartQ to choose randomly from your defined caption templates.
Use a particular template if you want all your post templates to have a single type of caption
Use random templates if you have created more than one template and you want SmartQ to choose randomly among them.
Select Hashtags
Outfy allows you to create multiple hashtag clouds to use in postings. A hashtag cloud is a group of similar hashtags that could be related to your product, category or store. There is a separate user guide for how to set up and manage hashtag clouds. In this setting, you can tell SnartQ how to use your hashtags.
You can choose which hashtag cloud SmartQ will select hashtags to add to your postings. In hashtag clouds, there is a way to map your hashtag clouds with your product categories. You can use that mapping. In this case, SmartQ will pick the hashtags from the correct board, based on the category of the product.
If your product is in more than one category, SmartQ can choose the hashtags from any category randomly.
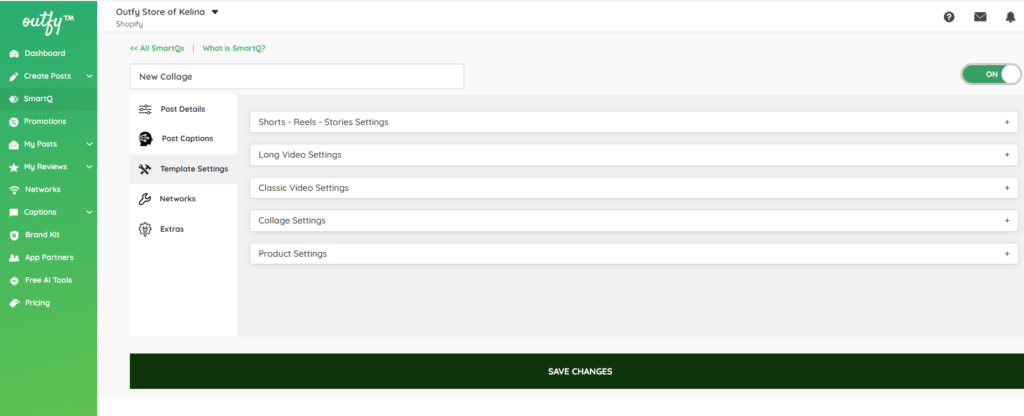
Template Settings #
You can customize each content type according to your needs, adjusting the layout, style, and settings to match your brand and posting goals.
Shorts (Video) Settings #
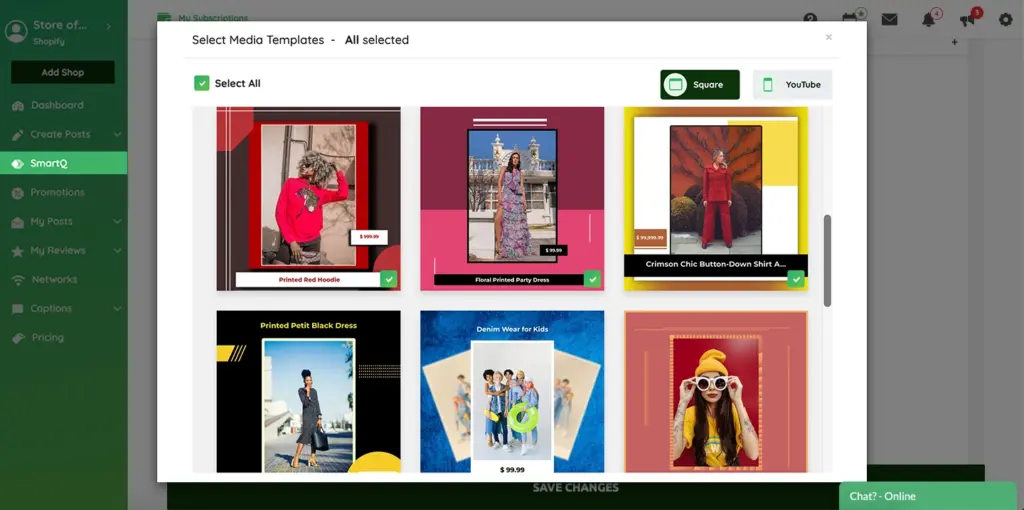
Media templates
Here is where you decide which video template you want to use. The pull down menu shows you your options.
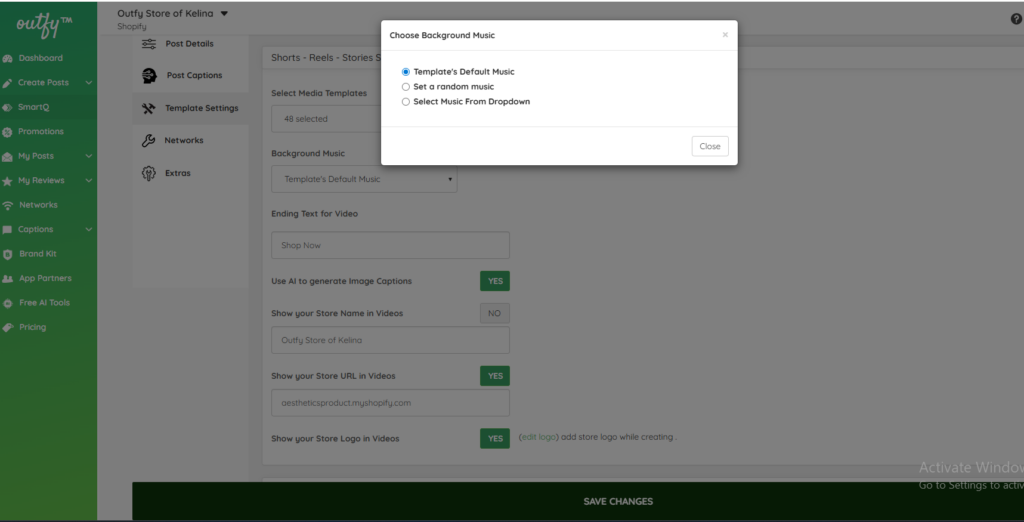
Background music
Here is where you decide which music you want to use. The pull down menu shows you your options.
Custom colors
Turn this ON if you want to change the default video colors and set them according to your brand. In each video, a set of 5 colors are used. You can change any or all of the colors.
Ending text
Each video is accompanied by an ending text which acts as the CTA (call to action). By default, it is set to “Shop Now” for videos. You can change it to something else like “Buy Now” or “Get it Today”.
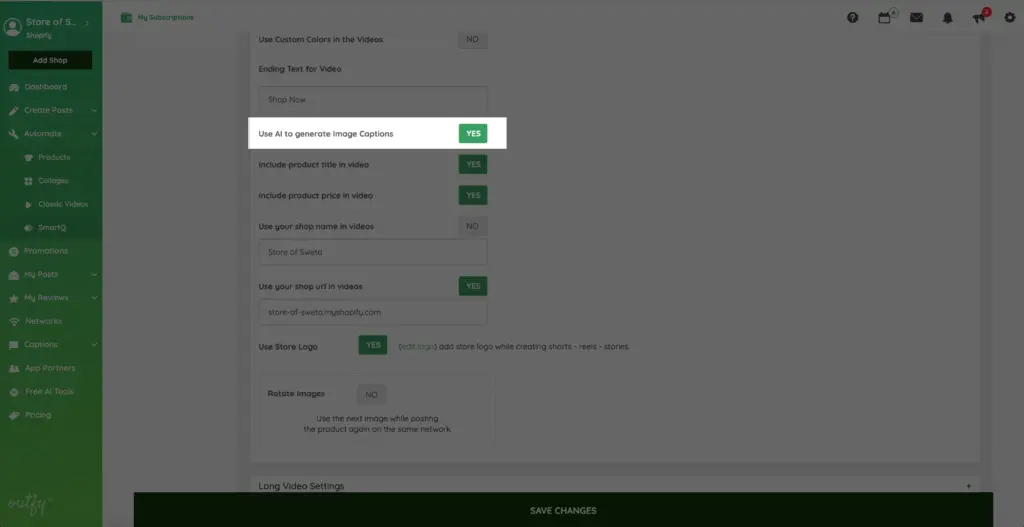
AI captions
Turn this option ON to get some amazing and dynamic captions in your videos. These video captions are generated from your product title and description.
Shop name and url
Here is where you put in the name and url of your store. The screencap shows you this exactly.
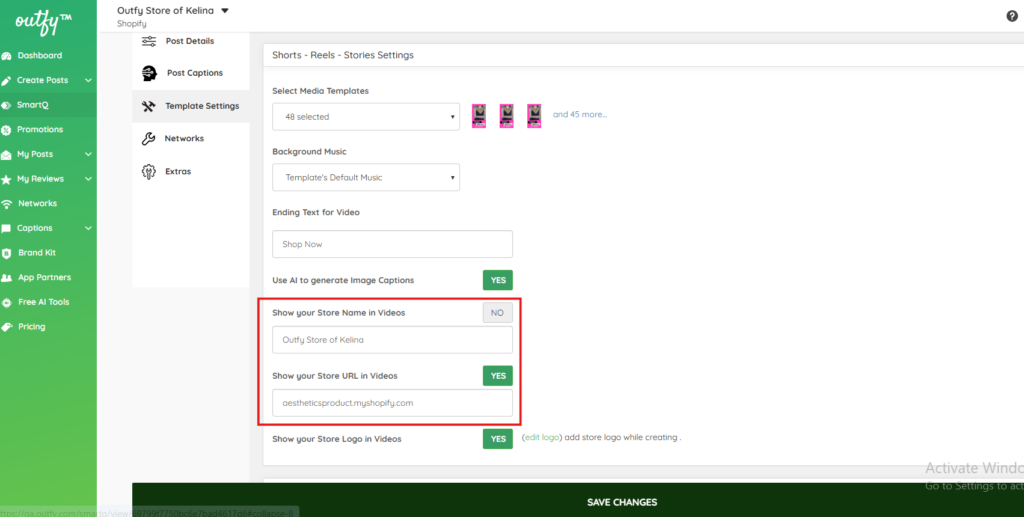
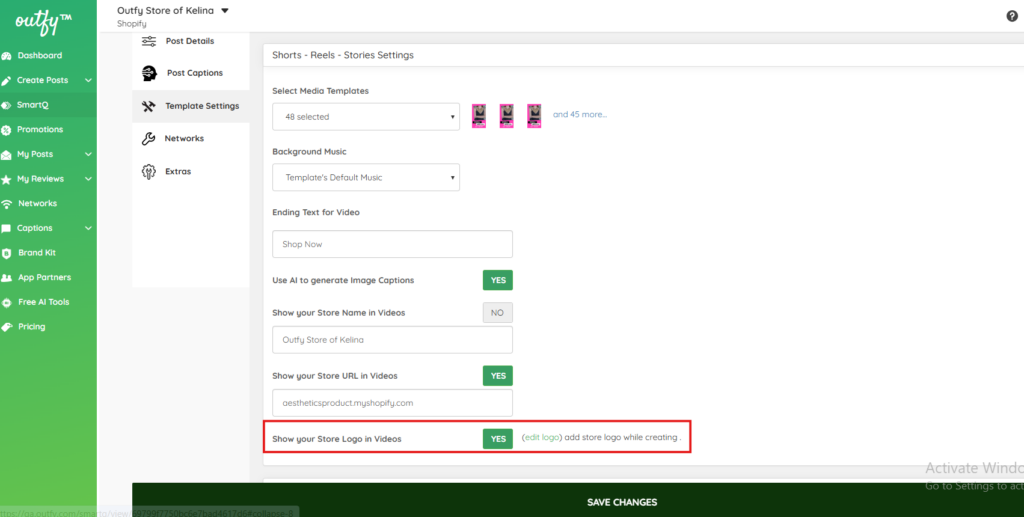
Store logo
Here is the button you press to decide whether or not you want your logo to appear.
Save Your Task
- Once all settings are configured, click Save Changes.
- That’s it! Your Short Video automation is now active and will run based on your schedule.
Long (Video) Settings #
Media templates
Here is where you decide which video template you want to use. The pull down menu shows you your options. You can choose square (1:1) templates suitable for Facebook, Instagram and Twitter or the Youtube format (9:16).
Background music
Here is where you decide which music you want to use. The pull down menu shows you your options.

Custom colors
Turn this ON if you want to change the default video colors and set them according to your brand. In each video, a set of 5 colors are used. You can change any or all of the colors.
Ending text
Each video is accompanied by an ending text which acts as the CTA (call to action). By default, it is set to “Shop Now” for videos. You can change it to something else like “Buy Now” or “Get it Today”.
AI captions
Turn this option ON to get some amazing and dynamic captions in your videos. These video captions are generated from your product title and description.
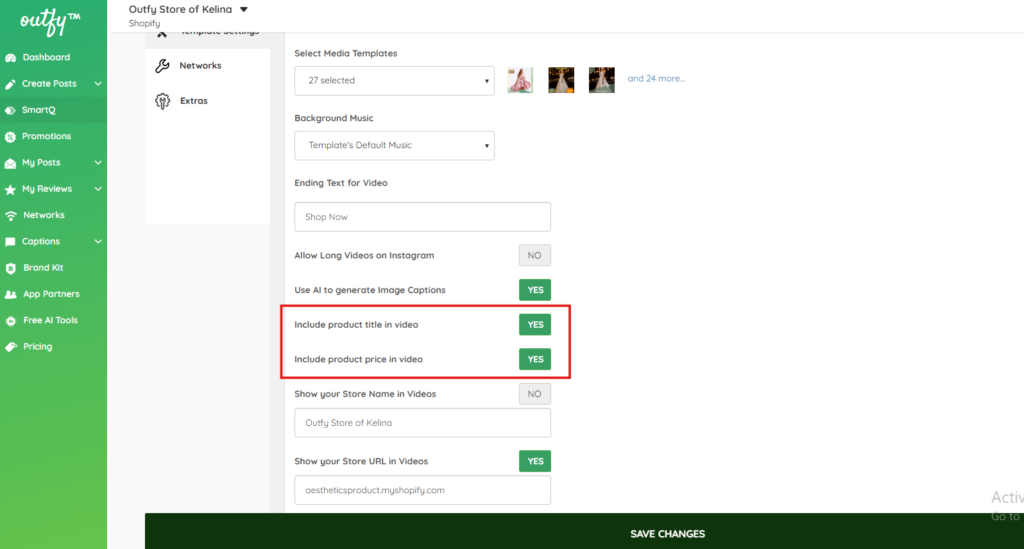
Product Title and Price
At times, you may not want to show your product titles or the prices in your videos. Turn off the options for each accordingly.
Shop name and url
Here is where you put in the name and url of your store. The screencap shows you this exactly.
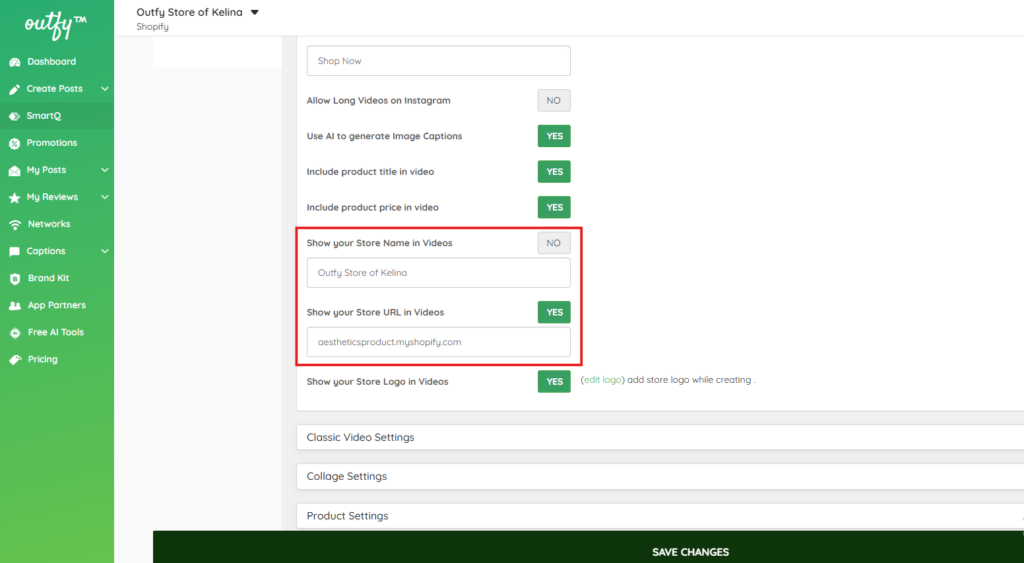
Store logo
Here is the button you press to decide whether or not you want your logo to appear.
Save Your Task
- Once all settings are configured, click Save Changes.
- That’s it! Your Long Video automation is now active and will run based on your schedule.
Classic Video Settings #
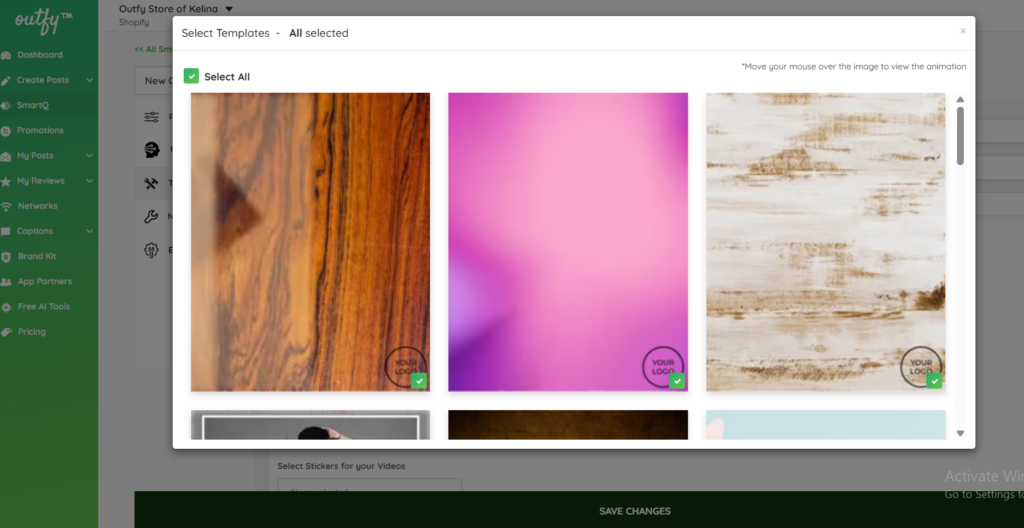
Select Template Designs
Choose the video templates you want to use for creating your classic videos.
Include Music in Videos
Turn music ON or OFF for your video content.
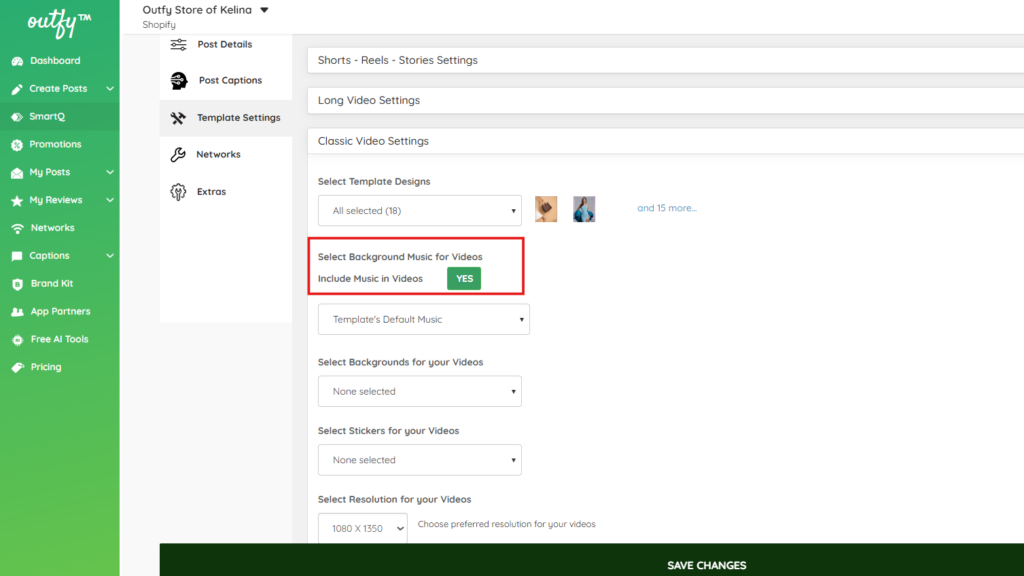
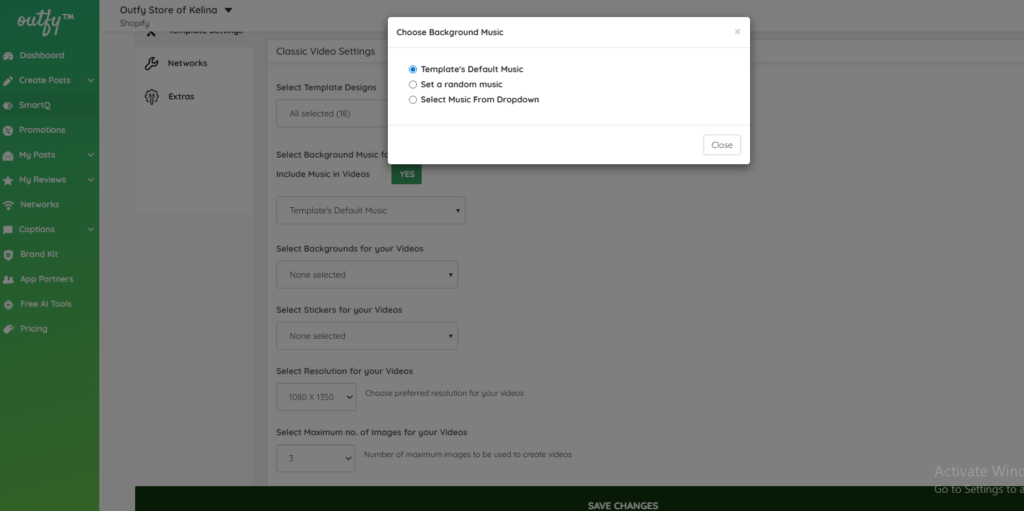
Select Background Music for Videos
Decide whether to include music in your videos and select the preferred background track.
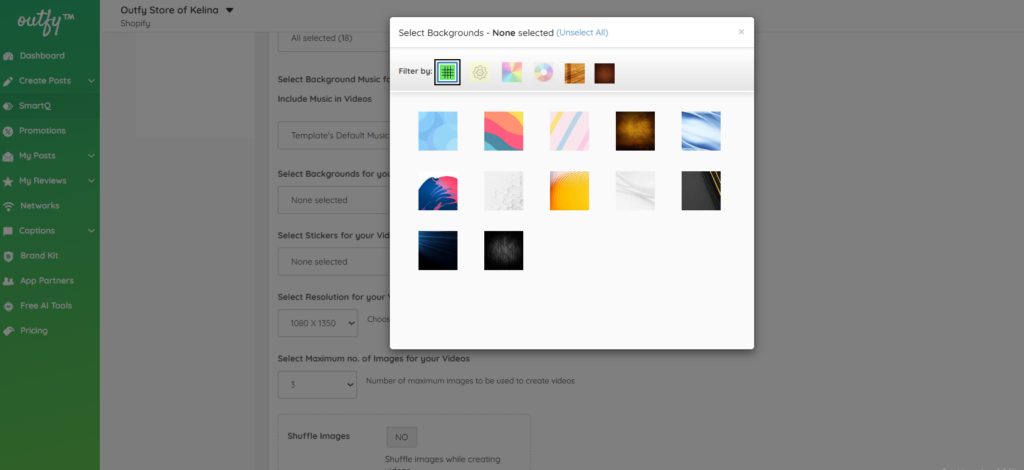
Select Backgrounds for your Videos
Pick backgrounds to enhance the visual style of your videos.
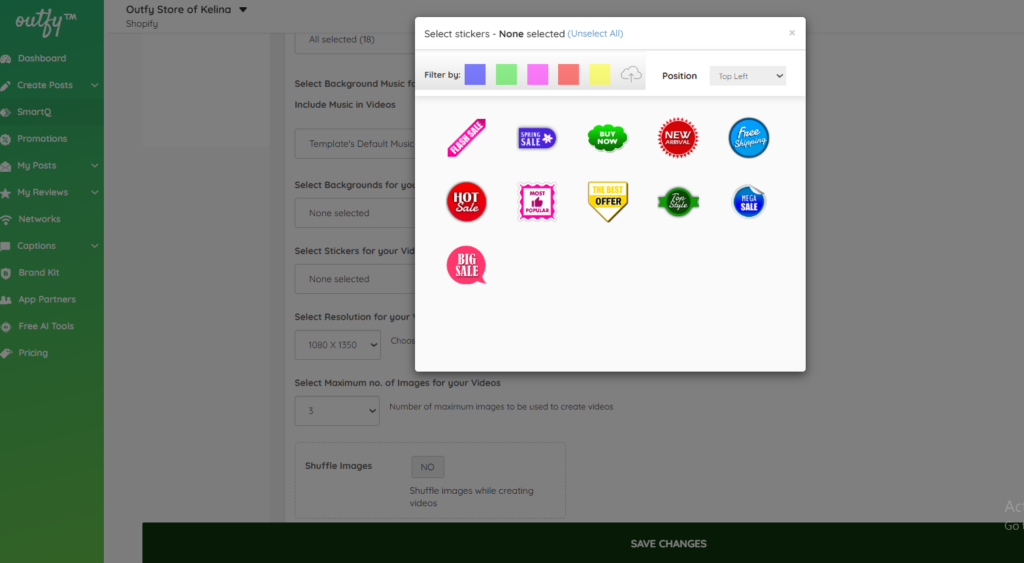
Select Stickers for your Videos
Add stickers to make your videos more engaging and eye-catching.
Resolution
Choose a resolution which fits best for your Classic Videos:
– 1080 x 1350 px
– 540 x 675 px
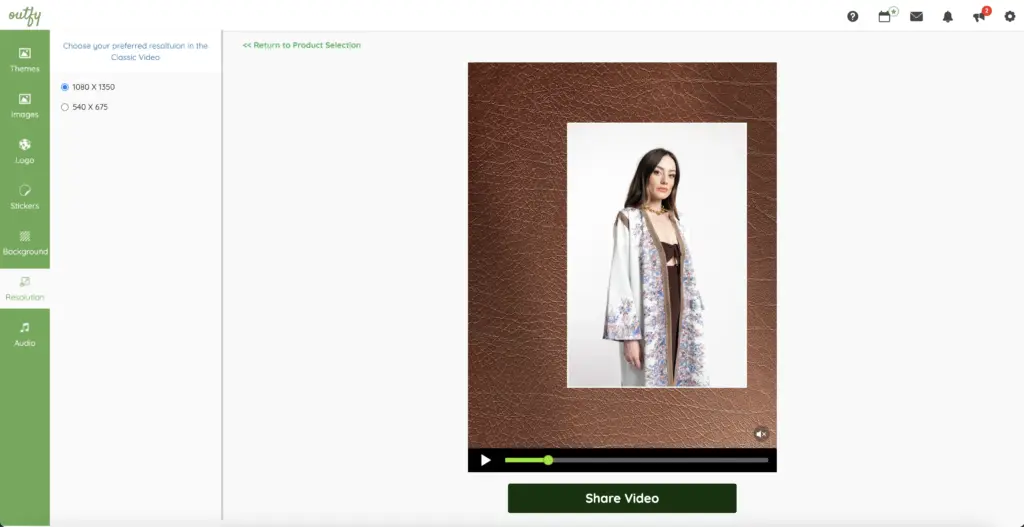
Image count
Here is where you decide how many product images in your Classic Video and whether or not your want the images to be shuffled in the animation.

Store logo
Here is where you decide whether or not you want to add your store logo to your Classic Video.
Save Your Task
- Once all settings are configured, click Save Changes.
- That’s it! Your classic Video automation is now active and will run based on your schedule.
Collage Settings #
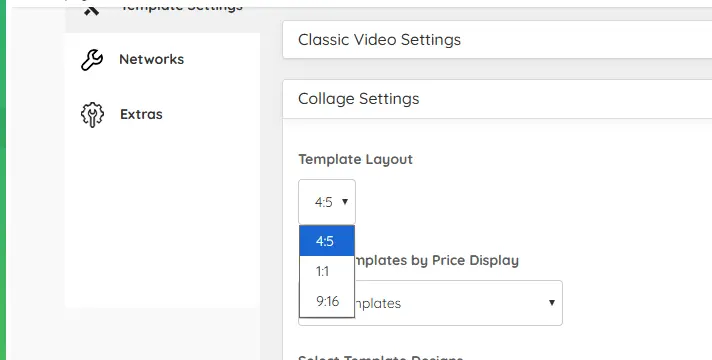
Template Layout
Choose the aspect ratio of your collage (for example: 4:5, 1:1, etc.) based on where you plan to post (Instagram, Facebook, etc.).
Filter Templates by Price Display
Use this dropdown to filter templates based on how prices are shown:
- All Templates
- Template that shows product Price
- Template Without Price
This helps you quickly select designs that match your pricing preference.
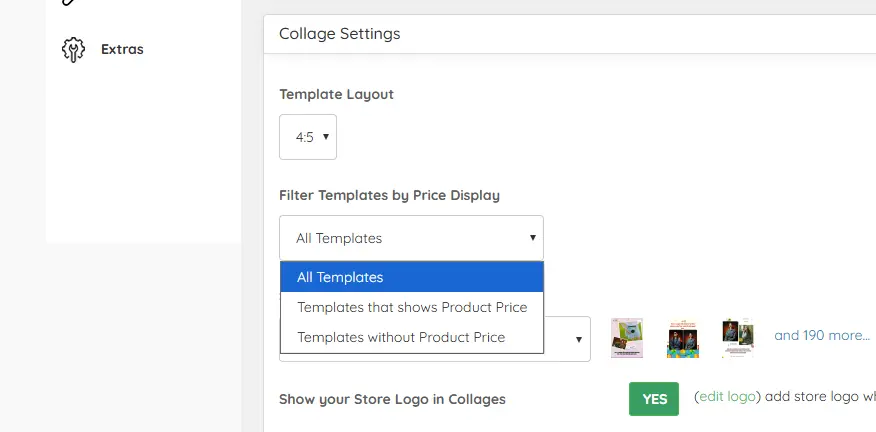
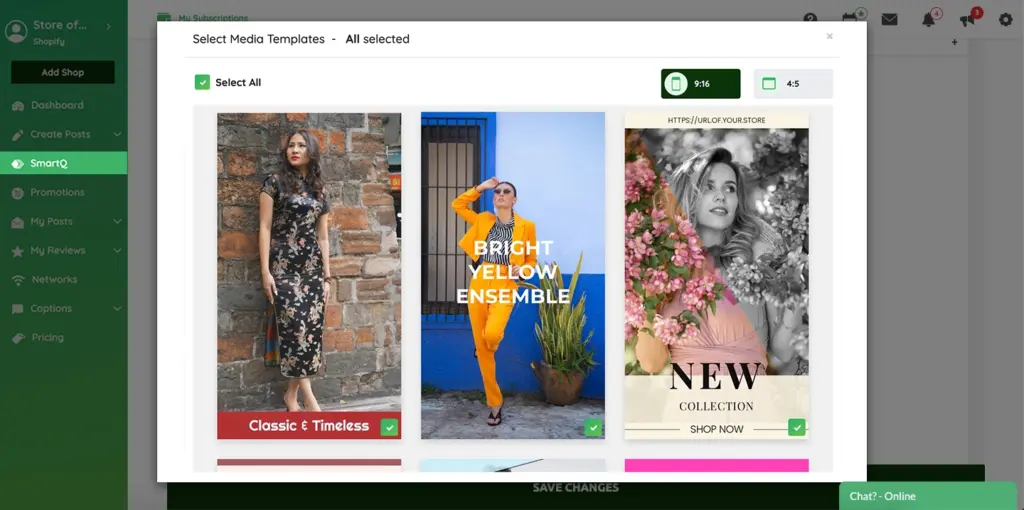
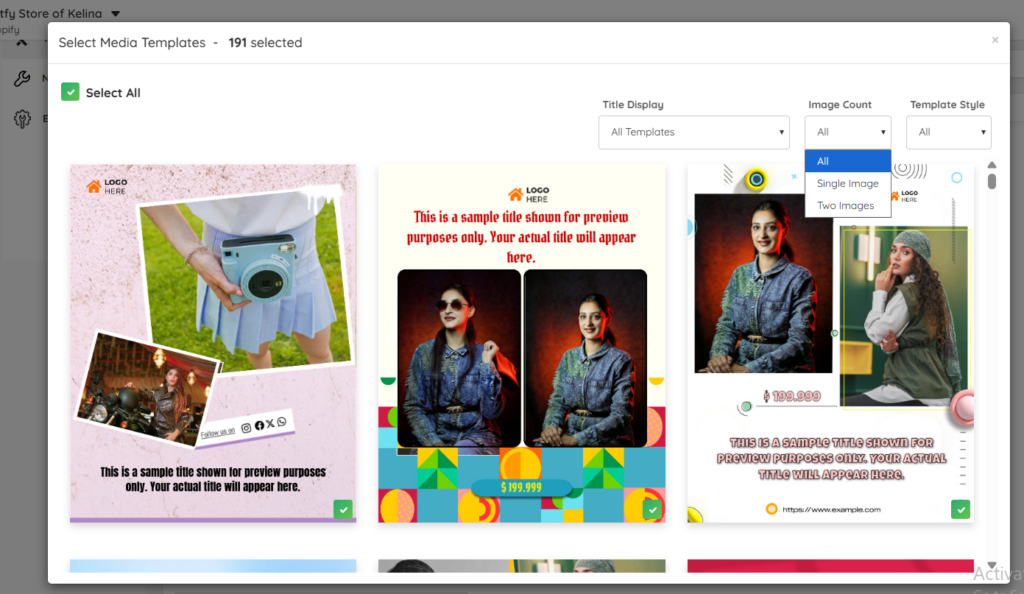
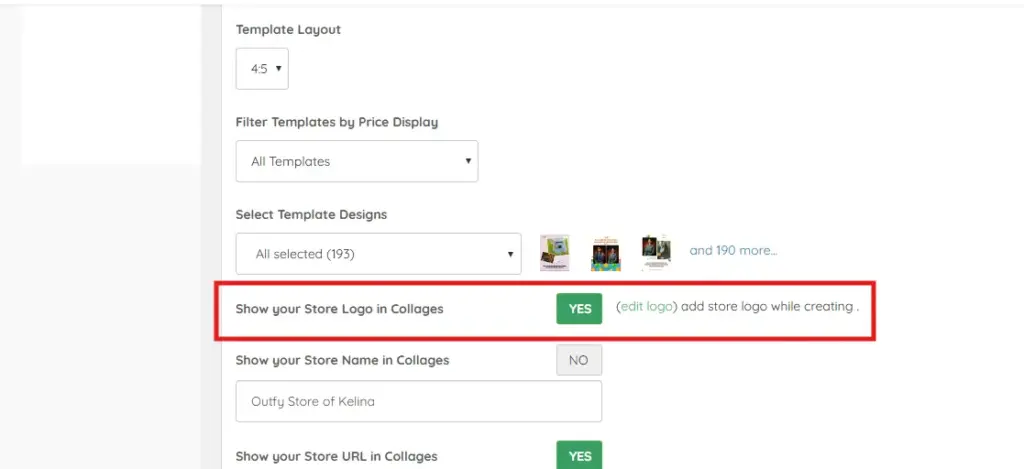
Select Template Designs
Choose which collage templates you want to use.
- The number of selected templates is shown (e.g., All selected (193)).
- You can select all templates or only specific ones.
Show your Store Logo in Collages
Decide whether your store logo should appear in your collages.
NO – Logo will not be shown.
You can click (edit logo) to upload or change your logo.
YES – Logo will be added to the collage.
Store Contact & Identity Details in Collages (Name, URL, Phone & Address)
This section lets you manage all your store’s identity and contact information that appears on your collages in one place.
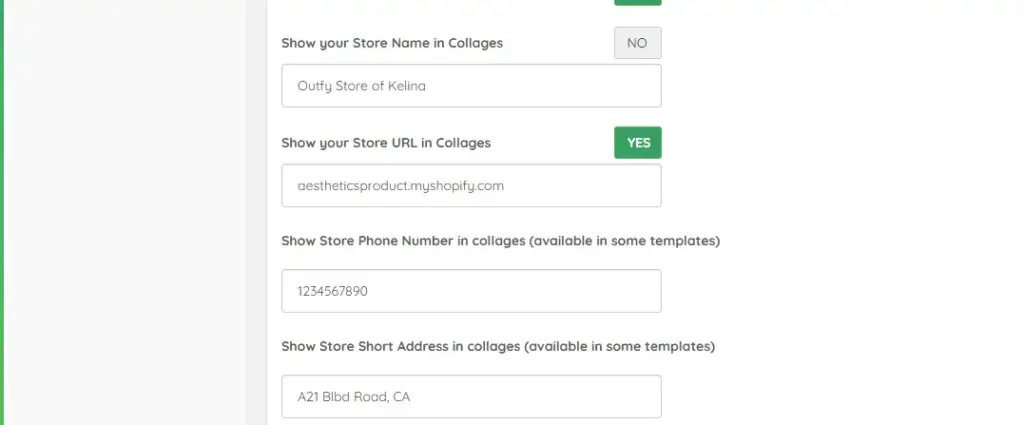
- Store Name
Toggle YES/NO to show or hide your store name.
Enter your store name in the field (e.g., Outfy Store of Kelina). - Store URL
Toggle YES/NO to show or hide your website link.
When enabled, your store URL (e.g.,aestheticsproduct.myshopify.com) will be displayed. - Store Phone Number (available in some templates only)
Add your contact number if you want it to appear in supported collage templates. - Store Short Address (available in some templates only)
Add a short version of your business address, such as:A21 Blvd Road, CA
This combined section helps you present all your important store details clearly and professionally on your collages.
Save Your Task
Once all settings are configured, click Save Changes.
That’s it! Your Collage automation is now active and will run based on your schedule.
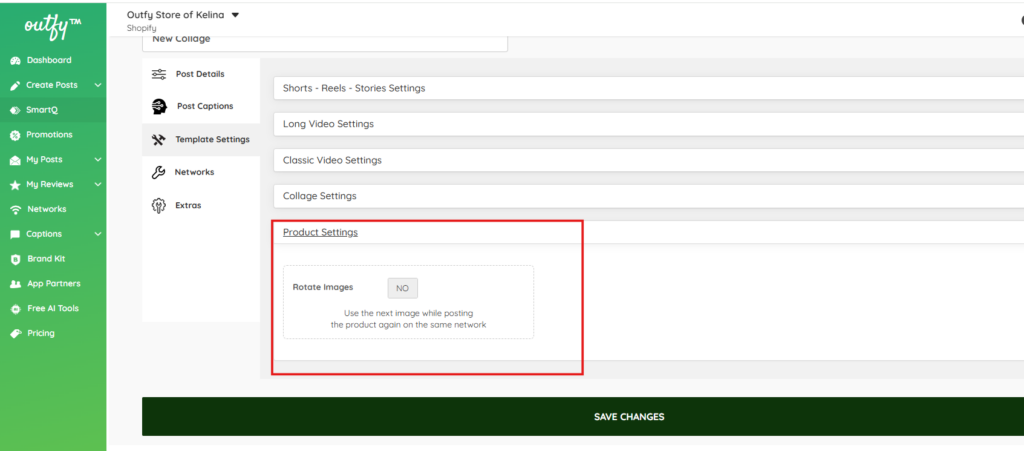
Product Settings #
Rotate images
Here is where you decide whether or not you want your products to be repeated when you post again on the same network.
Save Your Task
Once all settings are complete, click Save Changes.
Your SmartQ product post automation is now active and will run based on your schedule and selections
Network Settings #
In this section, you let SmartQ know which social media networks you want your content to be posted on. Choose the button next to each network to ON or OFF.
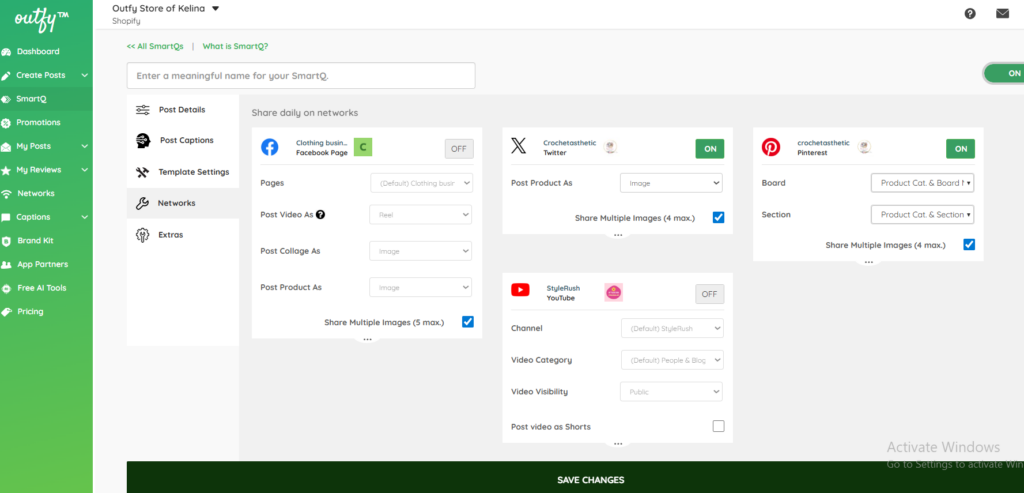
Each social network has its own posting options. Outfy automatically sets them to the best defaults, but you can always adjust them based on your preferences.
Facebook Settings
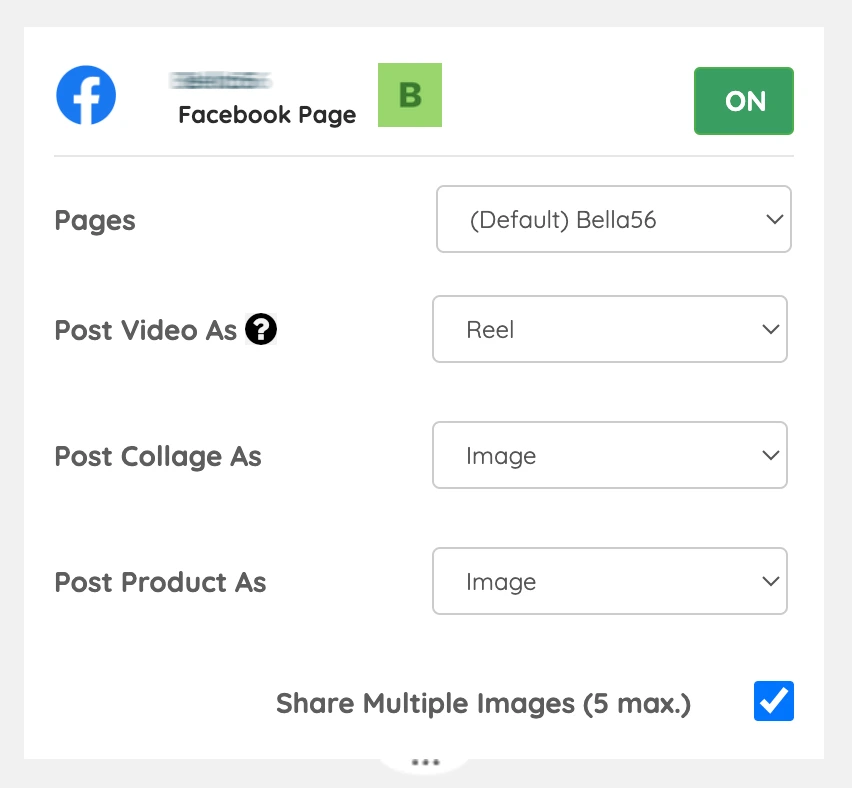
- Pages: Select the business page you would like to post on.
- Post Video as:
- Reels → Shorts (4:5), Classic videos (4:5), Long videos
- Stories→ Only Shorts (9:16) are supported
- Post Collage as: Share them either to your feed as an image or as a Story.
- Post Product as:
- Link Post → Clickable link takes viewers to the product page. Enable Share Multiple Images to create a carousel link.
- Image Post → Shares the first product image in a larger view. Enable Share Multiple Images to post multiple images.
- Story Post → Highlighted in Stories; only the first image will be shared.
Instagram Settings
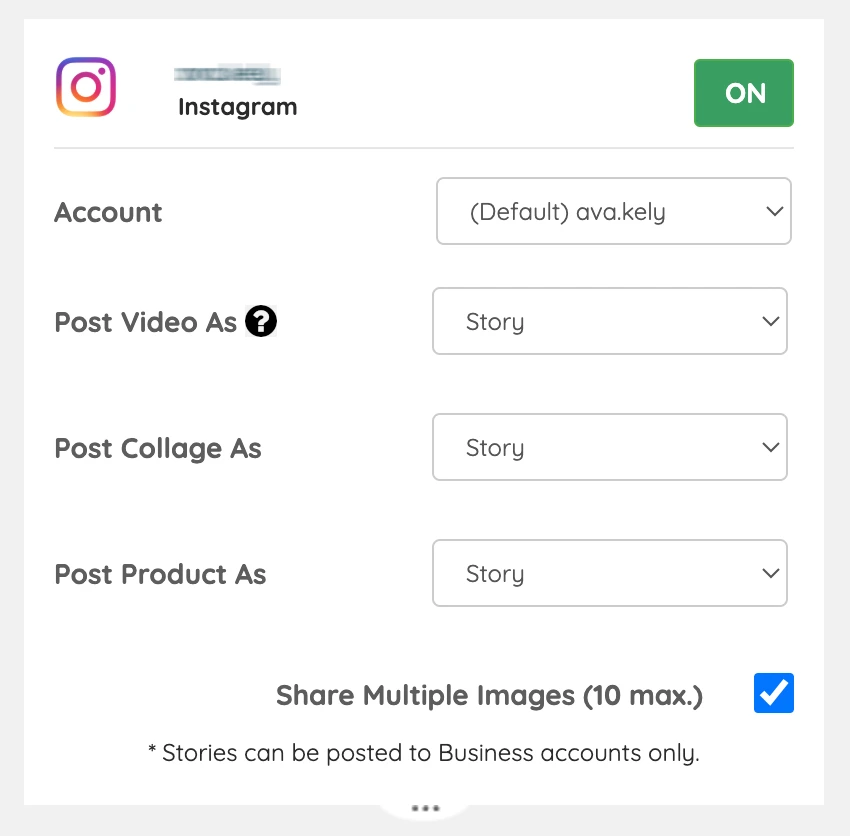
Post Video as:
- Post as Reels (shorts, classic, long) or Stories (shorts, classic, long)
- Post Collage as: Share as an Image (feed post) or a Story
Post Product as:
- Image Post → Shares the first product image in a larger view. Enable Share Multiple Images to post multiple images.
- Story Post → Highlighted in Stories; only the first image will be shared.
Threads Settings
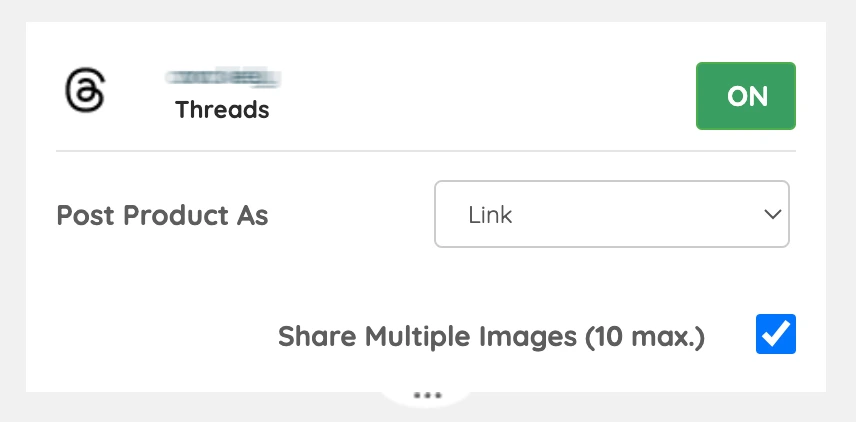
Post Product as:
- Link Post → Clickable link directs to the product page. Enable Share Multiple Images for a carousel link.
- Image Post → Shares the first product image in a larger view. Enable Share Multiple Images to post multiple images
Videos are posted directly to feed.
Collages are posted as images to the feed.
TikTok Settings
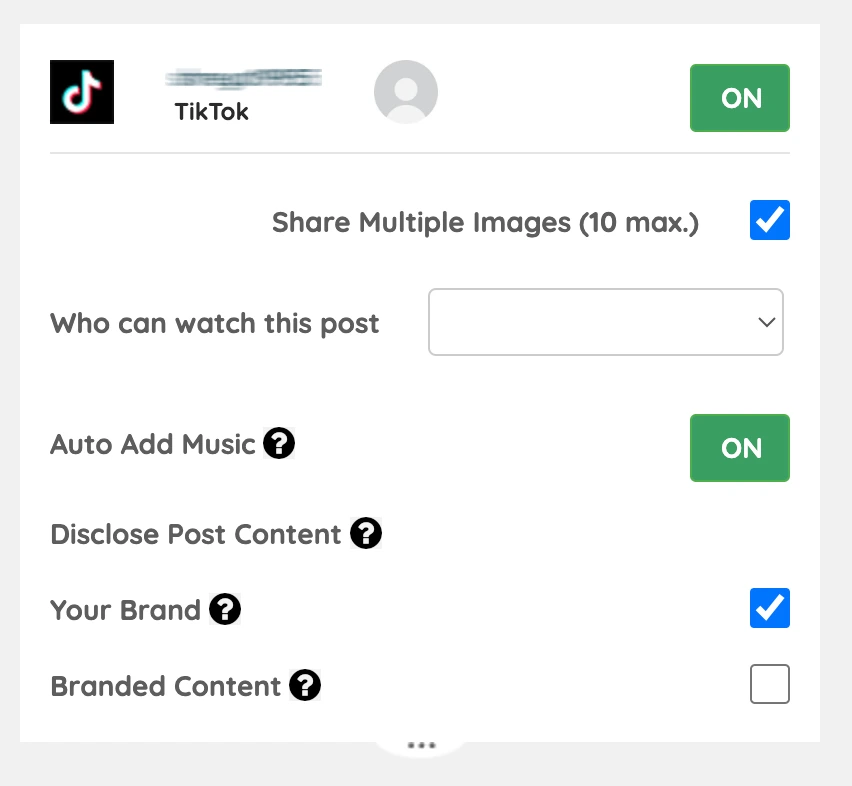
Share Multiple Images → Post several product images in one go.
Who Can Watch This Post → Choose between Everyone, Friends, or Private.
Auto Add Music → Automatically adds trending TikTok music (can be turned off).
- Disclose Post Content → Required by TikTok to label branded content:Your Brand → If promoting your own brand.
- Branded Content → If promoting another brand/product/service for payment or incentives.
YouTube Settings
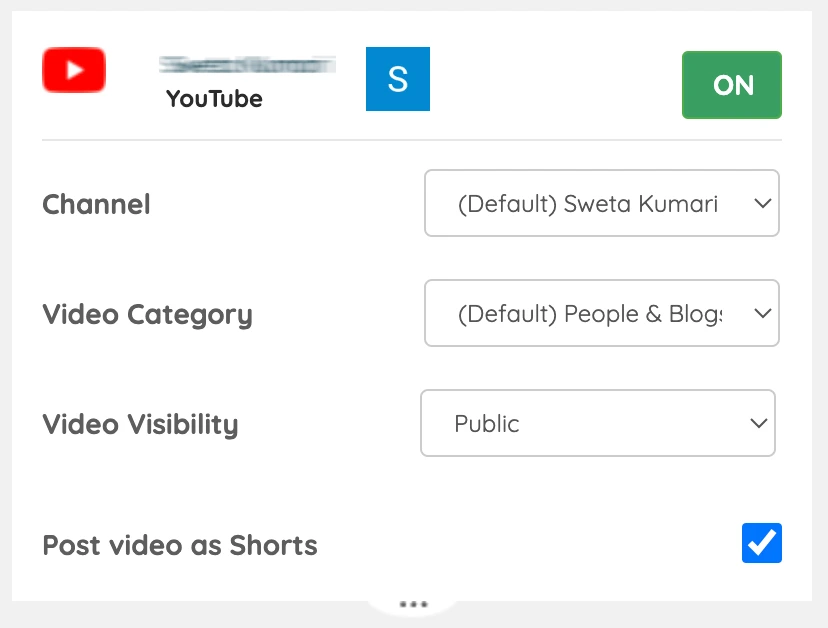
Channel → Select the YouTube channel for posting.
Video Category → Choose the most relevant category (e.g., Pets & Animals, Autos & Vehicles) or leave default (People & Blogs).
Video Visibility → Set as Public, Private, or Unlisted.
Post Video as Shorts → Enable this to publish all videos as Shorts.
Pinterest Settings

Board → Select the Pinterest board for posting.
Section → Further organize posts by selecting a board section.
Share Multiple Images → Post multiple images as a Pinterest carousel.
Twitter (X) Settings
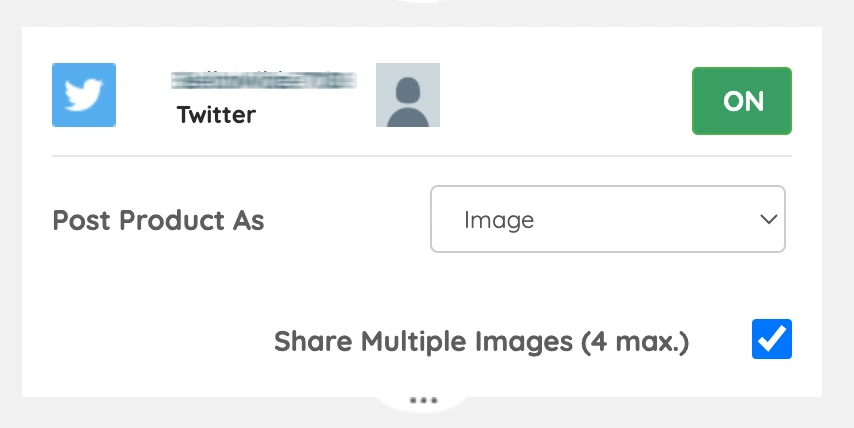
Post Product as:
- Link Post → Clickable link directs to the product page. Enable Share Multiple Images for a carousel link.
- Image Post → Shares the first product image in larger view. Enable Share Multiple Images to post multiple images.
Videos → Posted directly to feed.
Collages → Posted as an image to feed.
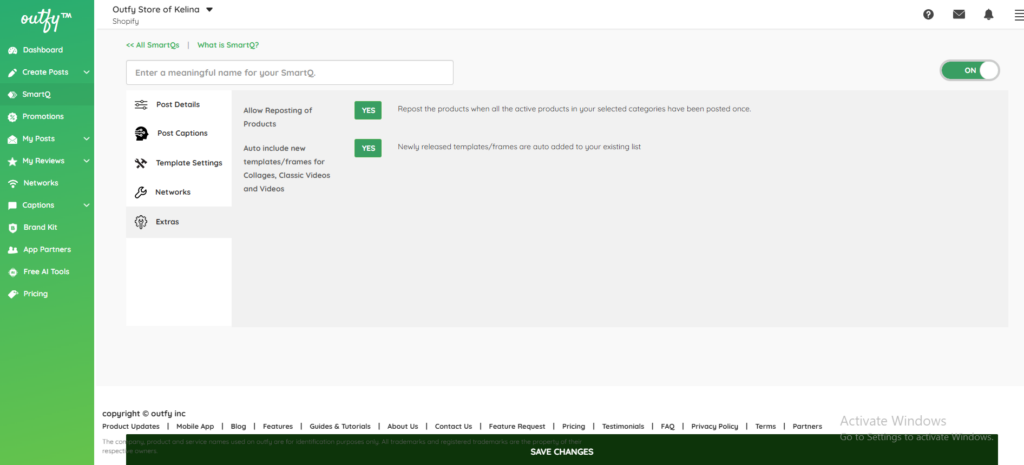
Extras Settings #
Allow Reposting of Products
Enable this to automatically repost products once all active products in your selected categories have been posted at least once.
Auto include new templates/frames for Collages, Classic Videos, and Videos
Turn this on to automatically add newly released templates and frames to your existing template list, so you always use the latest designs without manual updates.
Save SmartQ #
Don’t forget to save the instructions or you will have to do them all over again!


